Sometimes, before posting an image, you may need to add a stroke to the image in Photoshop. The border of the image is white and the background of the web page is white too. To reveal the outline of the image, it is necessary to do so. Adding a stroke in Photoshop is not something difficult. But when you have to process multiple images, adding strokes to images individually is tedious. As a matter of fact, you can add strokes to your images in a batch using Photoshop. You want to know how to do it? Please continue reading this article. You will find the tutorial in the following part.
How to batch add strokes to images in Photoshop
- First, you should put all your images in a folder. Throw one of these images into Photoshop.
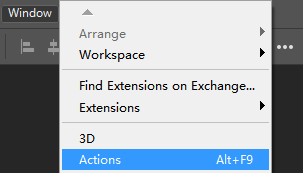
- Click on the "Window" menu and choose "Actions". Then, the "Actions" panel will be opened.
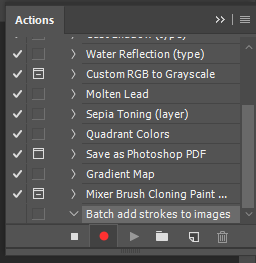
- Click on the "Create new action" button and the "New Action" dialog will appear. Name the action like "Batch add strokes to images" and click on the "Record" button.
- Now, add a stroke around the imported image. Right-click on the layer of the imported image and choose "Blending options" to open the "Layer Style" dialog. Choose "Stroke" and then tweak options to adjust the parameters of the stroke. Click on "OK" to close the "Layer Style" dialog. Click on "File"->"Save" to save the changes applied to the image.
- Photoshop has recorded all your actions. Go to the "Actions" panel and click on the "Stop playing/recording" button to stop recording actions.
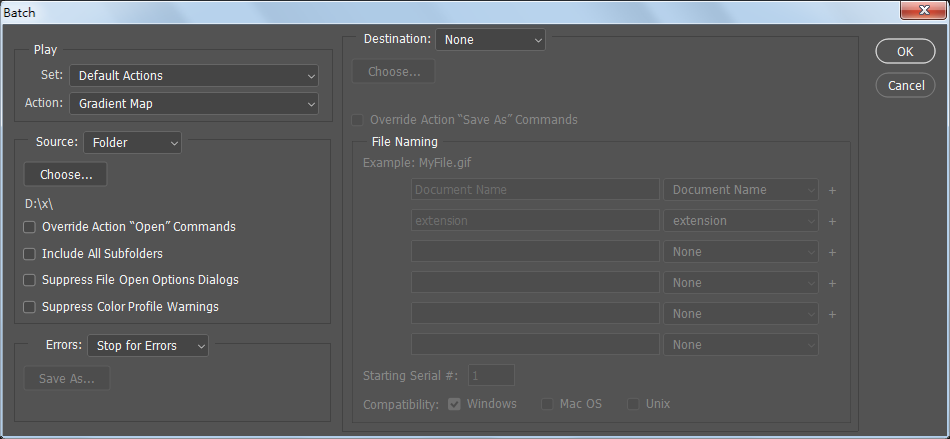
- Click on "File"->"Automate"->"Batch" to open the "Batch" dialog. You will see that the "Action" option is set to "Batch adding strokes to images". Click on the "Choose" button to choose the folder where your images are located. Click on "OK". Then, Photoshop starts batch adding strokes to the rest of images in the folder automatically.
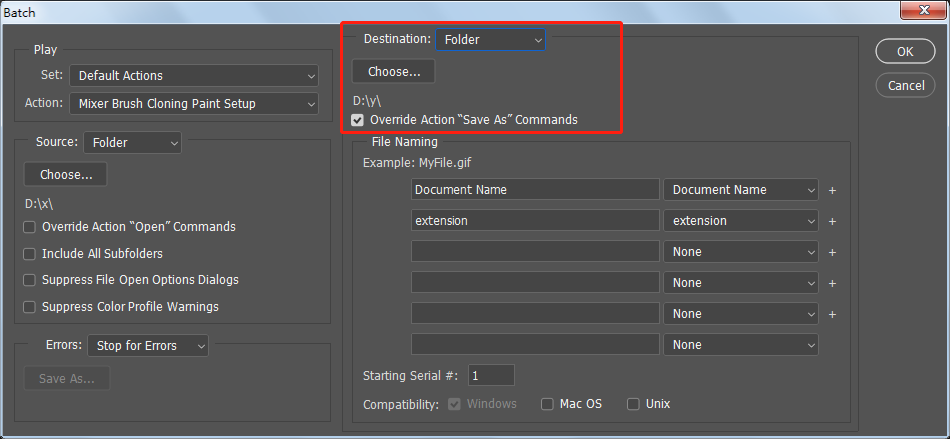
Tip: You can also choose "Save as" to save the first image as a new file to a different folder. To make the rest of the images saved in the same folder, you need to configure some settings about outputting images in the "Batch" dialog. Change the "Destination" setting from "None" to "Folder". Check the "Override Action "Save As" Commands" box. Click on the "Choose" button to specify the destination folder. Please note that if you don't check the "Override Action "Save As" Commands" box, you will get copied files when the batch action is done.
Summary
It is time-consuming if you deal with a lot of images and add the stroke to each image. This is when the batch mode of Photoshop comes to your rescue. You can use the batch mode not only to add strokes to images but also do other actions like saving images for web to compress images.