We are in the age of digital photos. Sometimes you want to collage these photos. You traveled to one city and took some photos of famous buildings. You want to put these photos in one image to show the city. You shot pictures of different birds and want to put the pictures together to create a collage with the theme of "bird". You want to put several family photographs side by side to introduce the family members. If you do not know how to make a photo collage, please continue reading this article. In this article, I will show you 5 ways to create a good collage.
Way 1. Make a photo collage in Photoshop
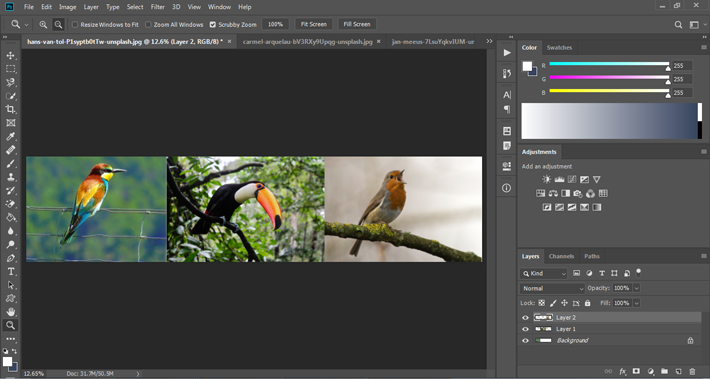
- Import your photos into Photoshop.
- If you want to combine photos horizontally, you should make the photos have the same height. If you want to combine photos vertically, you should make the photos have the same width. Let's say you want to combine photos horizontally. Click on "Image"->"Image Size" to resize the height for some images. Then, record the width of each photo shown in the "Image Size" dialog. Calculate the total width of the imported photos.
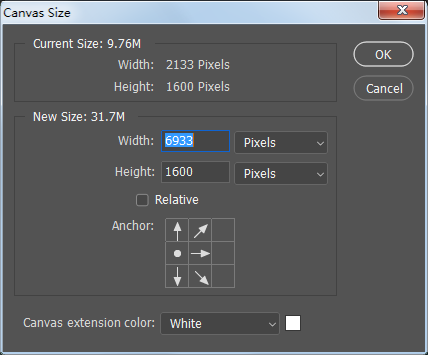
- Go to the tab of one photo. Click on "Image"->"Canvas Size" to open the "Canvas Size" dialog.
- Make sure the "Relative" box is unchecked. Type in the total width of the imported photos in the "Width" input field. Go to the "Anchor" section. The position of the anchor determines where a new part will be added to the current photo. To add a new part to the right side of the photo, click on the first cube cell from the left in the second row. To add a new part to the left side of the photo, click on the third cube cell from the left in the second row. To add one part to the left side of the image and one part to the right of the image, leave the anchor alone. In other words, this will place the image in the middle of the collage. Click on "OK" to close the "Canvas Size" dialog.
- Let's say you click on the first cube cell from the left in the second row. You will see a new part added to the right side of the photo. Drag and drop the layers of other photos into the added part. Move the photos in the canvas to the proper positions.
- Finally, export the combined photo.
Way 2. Make a photo collage in PineTools
PineTools is a wonderful online app that offers a variety of tools to manipulate images. One of these tools is the image merging tool that enables you to merge two photos at a time.
- Head over to the site. Go to the left-hand pane and choose "Images". Scroll down and choose "MERGE IMAGES".
- Now, you are taken to a new webpage. Click on "Choose file" in the "FIRST IMAGE" section to add one photo. Click on "Choose file" in the "SECOND IMAGE" section to add another photo.
- Go to the "OPTIONS" section. Choose the direction you merge photos. There are three ways to adjust the size of the photos including "Reduce the biggest", "Magnify the biggest", and "Crop the biggest". Choose one if needed. Make sure that you check the box "Constrain proportions (keep aspect ratio) (recommended)". If you don't need to adjust the size, select "Do not adjust". Go to the "Thickness of the border (px)" section. Pull the slider to adjust the size of the outer border of the merged photo and the size of the border of two adjacent photos. Go to the "COLOR OF THE BORDER" section. Here you can pick one color as the color of the border.

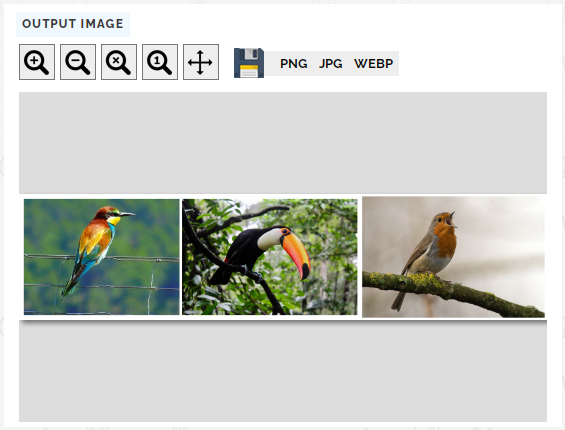
- Press the green "MERGE!" button to start uploading and merging photos. You will see the merged photo when the process is done.
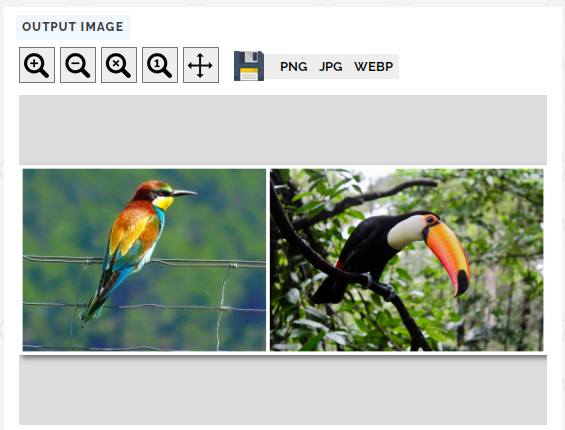
- Choose the output image format you like by clicking on "PNG", "JPG", or "WEBP". The output image will be downloaded to your computer automatically.
- Add the merged photo and the other photo to PineTools. Do the same actions to merge them to obtain the final merged photo.
Way 3. Make a photo collage in Fotor
Fotor is a nice photo collage maker, which offers many stylish templates. To use Fotor, you have to sign up for an account. Some templates are only available for premium users.
- Go to the home page of Fotor. Navigate to "Features" on the top of the webpage and go to "Photo Collage". Select "Collage Maker".
- Press the "Make Photo Collage Now" button and you will be taken to an online editor. Sign in with your account.
- There are different template categories in the left-hand pane including "Classic", "Artistic", "Funky", and "Stitching". Choose one category and select the template you like under this category. Let's say you select a template of "Classic".
- Go to the right-hand pane and press the "+ Import" button to upload your photos.
- When your photo are uploaded to Fotors, drag and drop each one into the corresponding part of the canvas. You can also fill in the canvas with the imported photos by clicking on the "Fill in" button and then adjust the order of the photos. You are allowed to move each photo in the canvas to reveal the part you want.
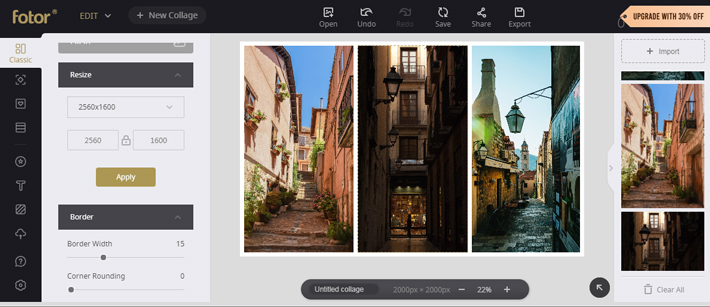
- You can resize the collage in the "Resize" tab and adjust the border width and the corner rounding in the "Border" tab. Please note that if you customize the size, don't forget to press the "Apply" button. You can also customize the color of the borders in the "Color & Texture" tab.
- When you are ready, press the "Export" button on the top of the editor. Type in the name of the output image. Choose the output format and the image quality. Press the "Sign in to download" to start creating the collage and downloading it to your computer.
Way 4. Make a photo collage in Image Online.co
Image Online.co is a free online tool that can help you merge photos into a collage. There is no limit to the number of photos you merge each time.
- Go to "Image Manipulation tools" and select "Merge Images".
- Image Online.co will not allow you to adjust the order of photos after you add them to the program. So, you should click on "+ Add images" to add photos individually in a sequence.
- Go to the "Please Select Merge direction" section. Choose "Vertically" or "Horizontally" to designate the direction you place the photos in the collage.
- Go to the "Option to Resize and Fit images during merge process" section. If the photos to be merged don't have the same width or height, choose "Resize to Lowest Dimension image" or "Resize to Highest Dimension image" to resize photos. If you don't need to resize photos, just keep the default setting "Do Not Resize".
- Press the "Merge Image" button to begin uploading and merging photos.
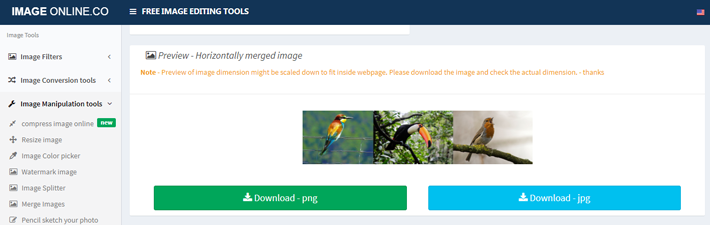
- When the process is done, you will see the created collage in the preview area.
- Press "Download – png" or "Download – jpg" to choose the format of the output image and download it to your computer.
Way 5. Make a photo collage in Photo Joiner
Photo Joiner is a free web-based photo collage creator. Like Fotor, Photo Joiner provides a lot of creative collaging layout templates.
- Press the "Create Collage" button on the homepage.
- In the collage maker editor, go to the left-hand pane, select one template category, and choose one template.
- Go to the right-hand pane and click on "+ ADD IMAGES" to upload your photos.
- Drag each photo into the canvas part where you want it to be. Click on the photo and you will see a pop-up panel. If you want to remove the photo, click on the "Remove" button in the panel. Besides the "Remove" button, you will also see an "View" button in the panel. Clicking on this button will open the "IMAGE VIEW SETTINGS" dialog. You can zoom, rotate and flip the photo in this dialog. If you want to close the panel, just click somewhere outside the canvas.
- Go to the tab of the selected template category. Adjust the size of the collage. You can choose one preset size or customize the size. To apply the size you set to the collage, press the "APPLY" button. You can also adjust the border size and the border color.
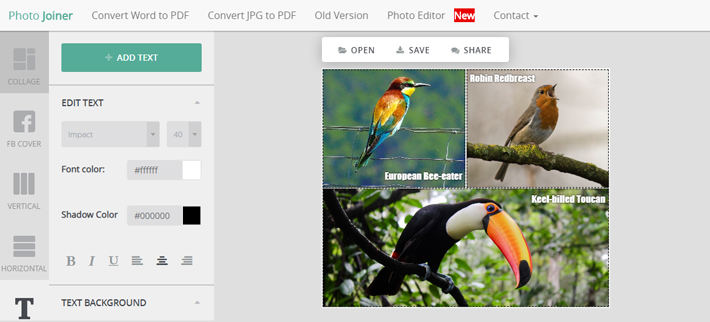
- Go to the "Text" tab. Here you can add text to the photo. Press the "+ ADD TEXT" button and a text box will appear on the collage. Type in the words in the text box. Click on the cube handle and hold down the mouse button. Move the text to the right position. Adjust its size using the circle handles. Clicking on the cube handle will close the text box. Go to the "EDIT TEXT" section in the "TEXT" tab to edit the text . For example, you can choose the font and the font size, pick the font color and the shadow color, and make the text bold or not. Go to the "TEXT BACKGROUND" section. Here you can pick the background color and adjust its opacity. If you want to make the background 100% transparent, move the "Opacity" slider to the far left.
- When you are ready, press the "SAVE" button above the canvas to start making the collage. When the process is done, press the "DOWNLOAD PHOTO" button to download the collage.
Summary
Making photo collages is a great way to express themes and tell stories, which helps get more social shares. I've shown you 5 ways to join multiple photos into a collage in the previous parts. I strongly recommend you try Fotor and Photo Joiner if you want to make personalized collages. If you like this tutorial, share it with your friends.