
You are a nature lover and shot several photographs of some cute birds. You posted your photos online but later found that someone published your photos on social media and claimed the photos were his work. Or you took photos of beautiful scenes and uploaded them to your Facebook account. However, someone used your photo on a Facebook page to get likes and shares. It is annoying that your images are stolen and used to get much traffic for others. To prevent someone from stealing your image, you need to add watermarks to photos to protect your copyright. In this article, I will show you several ways to watermark your photos.
Way 1. Use BeFunky to add a watermark to your photo
With a clean and user-friendly interface, BeFunky is a very nice online photo editor that I introduced in a previous article about making photo frames. It lets you add a text watermark or an image watermark to your photo.
First, let me show you how to add a text watermark to your photo using BeFunky.
- Head over to the site. Press "Get Started"->"Edit a photo".
- Click on "Open"-> "Computer" to upload your photo.
- Go to the left-hand pane and select "Text".
- You will see a couple of text styles below the "Add Text" button. Select one and a text will appear on the photo.
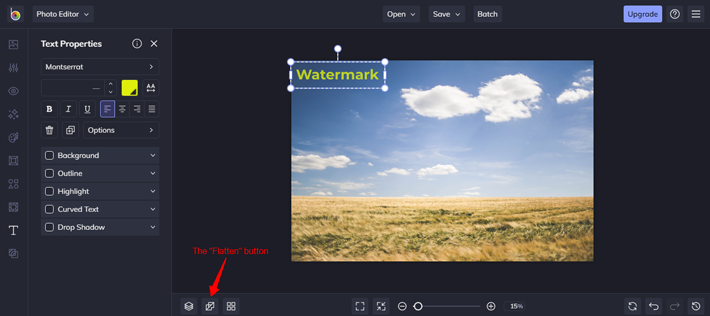
- Edit the text. Tweak the properties of the text like color, font, font size, bolding, italicizing, underlining, opacity, outline, background, and alignment. You can also zoom the text using the marquee. Move the text you added to the right position.
- If you want the text to become a part of the photo, click on the "Flatten" button at the top left corner of the preview panel.
- Finally, click on "Save"->"Computer" to download the watermarked photo.
Now, let's see how to use BeFunky to add an image watermark to your photo.
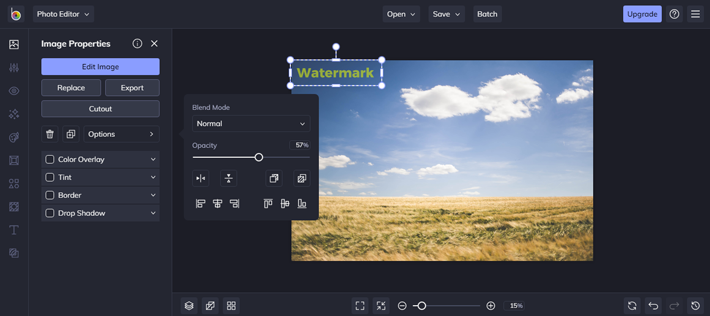
- After uploading your photo to BeFunky, go to the "Image Manager" tab and click on "Edit Image" to upload an image. The image will be placed on the photo. Resize the image by scaling it up or down and drag the image to where you want it to be. There are some options for you to modify the properties of the image like "Color Overlay", "Tint", "Border", "Drop Shadow". If the image is overbearing, click on the "Options" button and move the "Opacity" slider to tone it down.
- The added image and the photo are two images. If you want to make one image, click on the "Flatten" button to flatten layers.
- Click on "Save"->"Computer" to get the watermarked photo.
BeFunky allows you to start creating a watermark to an image in the "Save to Computer" step. This is another method to watermark your photo in BeFunky. Using this method requires signing up and upgrading your account to BeFunky plus.
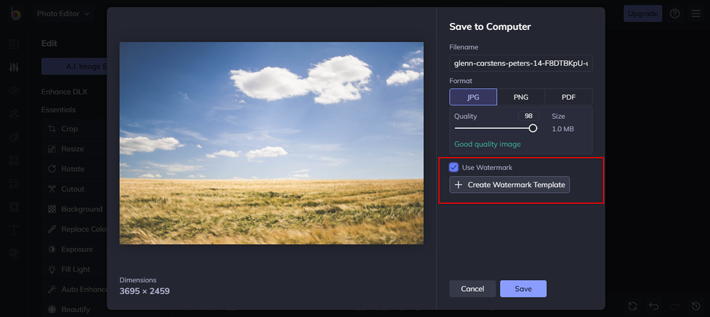
- Import your image to BeFunky and click on "Save"->"Computer".
- There is a "Use Watermark" checkbox in the "Save to Computer" dialog. Check "Use Watermark" and the "+ Create Watermark Template" button will show up. Press the "+ Create Watermark Template" and you will see the "Watermark Template Editor" dialog.
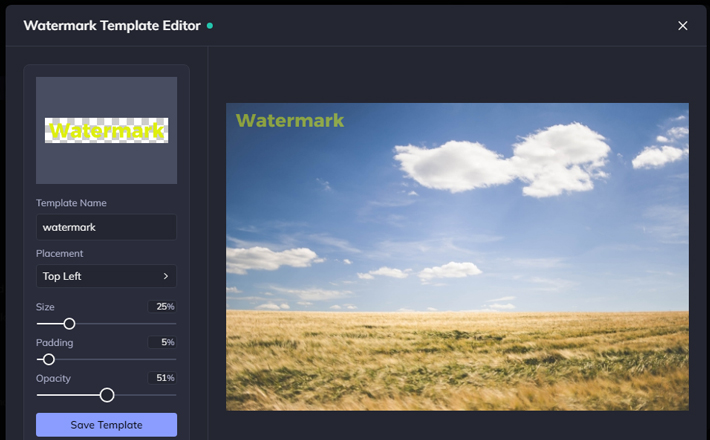
- Click on "Upload Watermark" to upload an image as the watermark. Now, you can customize the placement, opacity, padding, and size for the added image. Click on "Save Template" to save the created watermark and close the "Watermark Template Editor" dialog. Press "Save" to save the watermarked photo to your computer.
Way 2. Use Photoshop to add a watermark to your photo
- Import your photo into Photoshop. Click on "Layer" on the top of Photoshop. Navigate to "New" and select "Layer".
- The "New Layer" dialog box will pop up. Name the layer to be created and click on "OK".
- Go to the left pane and select the "Text" tool. Click somewhere on the image and type in words as the copyright notice.
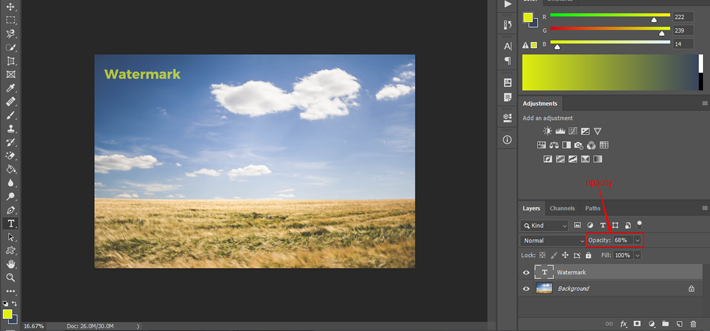
- You can play around the font, font size, color, and other properties. Drag and drop the text to the position where you want it to go. Go to the "Layers" tab at the bottom right corner of Photoshop. Click on the downward arrow beside "Opacity" and drag the slider to adjust the opacity of the text. If you want the text and the photo to be one layer, right-click on the layer of the text and choose "Flatten Image".
- It is also easy to add an image watermark to your photo in Photoshop. Just import your prepared image to Photoshop. Drag and drop the layer of the image to the photo and the image will be added to the photo. Move the image to the position where you want it to be.
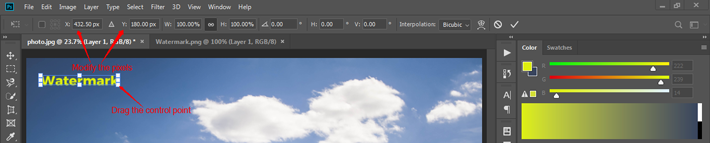
- To adjust the size of the image added to the photo, select the layer of the image and press "Ctrl+T" keys. You will see the outline of the image. There are two ways to adjust the size of the image. Modify the pixels of the image in the "X:" box and "Y:"box. Or drag one control point around the image to zoom the image. As I mentioned about how to adjust the opacity of the text watermark before, change the opacity of the image watermark layer to make the image watermark somewhat transparent.
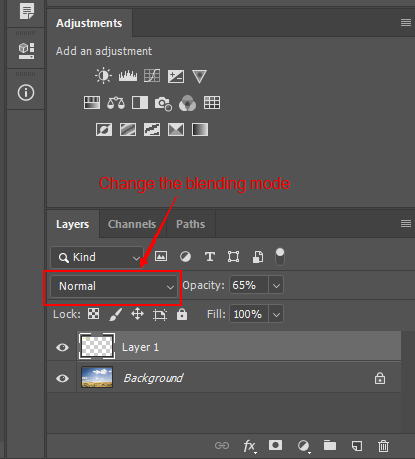
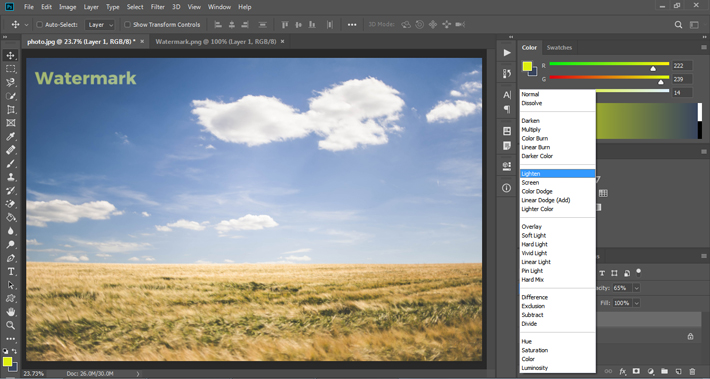
- You can change the blending mode to adjust the style of the image watermark. The blending mode is "Normal" by default in the "Layers" tab. Make sure the layer of the image watermark is selected. Open the "Normal" drop-down menu and select the mode you want like "Darken", "Lighten", "Overlay", "Soft Light", and "Hard Light". Hover your mouse cursor over each mode and you can preview the effect of each mode on the image watermark.
Way 3. Use Make Watermark to add a watermark to your photo
Make Watermark is a wonderful online tool to quickly make and add a watermark to your photo. You can watermark your photo with a text as well as an image. Please note that the free version puts a logo on the exported photos. To remove this logo, you have to upgrade the free version to the full version.
- Go to the homepage of Make Watermark and press "Start Make Watermark".
- Drag and drop your photo into the working space and then click on "NEXT STEP".
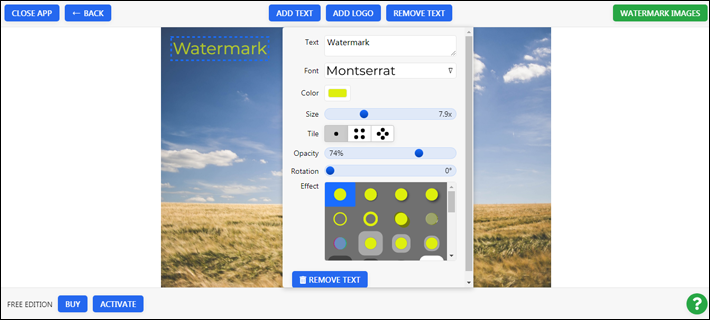
- Now, if you want to add a text watermark, click on "ADD TEXT". You will see an editing pane show up. Type in words in the "Text" field. Choose the font and color you prefer. Adjust the size, opacity, and angle of the text by dragging sliders respectively. Add a desired effect to the text to get a stylish look. Move the text to a proper position. There are two tiling styles for you to choose in case you want to fill the entire photo with a tile text watermark and you are allowed to adjust the space between texts.
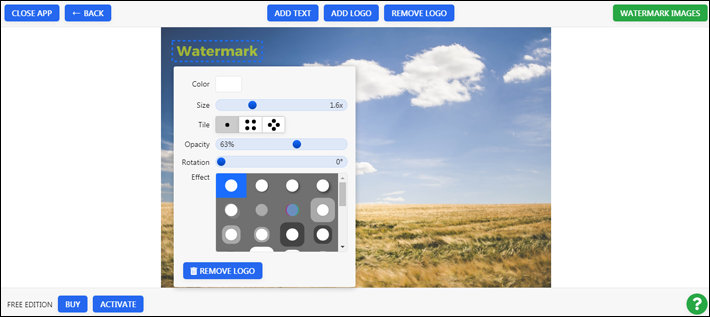
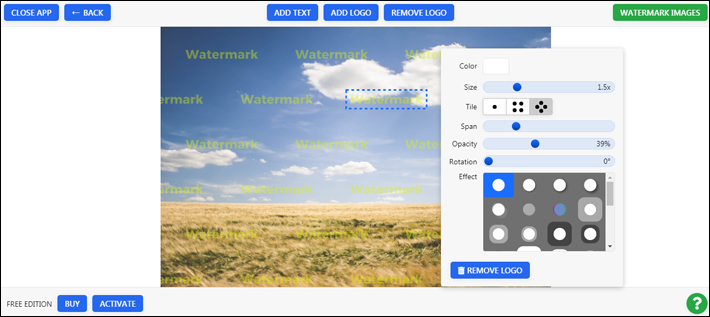
- If you want to add an image watermark, click on "ADD LOGO". Click on "FROM MY COMPUTER" to upload an image. Then, you can tune up its position, size, opacity, angle, and effect. You can also use the tile feature to apply a tiling watermark effect to the photo and tweak the span between images.
- When you are done with placing a text watermark or an image watermark to your photo, press "WATERMARK IMAGES" on the top right corner. Choose the quality for the output image. Resize it or not. Then, you can click on "PREVIEW WATERMARK" to preview the watermark or directly click on "WATERMARK IMAGES" to start watermarking the photo. When the watermarking process is done, click on the watermarked photo to your computer.
Way 4. Use Microsoft Paint to add a watermark to your photo
You may neglect Microsoft Paint when it comes to watermarking your photos. As a matter of fact, you can use Microsoft Paint to add a text watermark to your photo and it is very easy.
- Launch Microsoft Paint and import your photo.
- Go to the editing pane and click on the "A" button.
- Click anywhere on the image and type in a text.
- Change the font, font size, font style and color of the text.
- Click on the "Save" button to save the changes.
Way 5. Use Water Marquee to add a watermark to your photo
Watermark Marquee is a free online app to watermark your photograph. Its free version does not add a logo to the watermarked photo.
- Go to the site and press "START WATERMARKING FOR FREE".
- Drag and drop your photo into the working space.
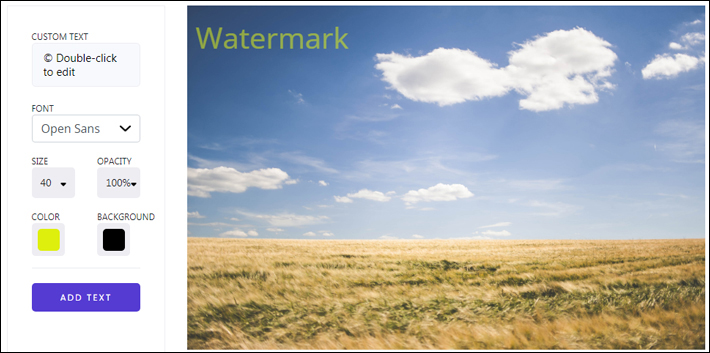
- Go to the left-hand pane and click on "Add Text". Then, you can write a text and modify the font, font size, color, opacity, and background of the text.
- Watermark Marquee also gives you some templates for creating a text watermark. Go to the bottom of the editor. Press "Add Template". Then, go to the left-hand pane and choose a template like "Jane Smith", "Smith Photography", and "Jackson Smith Photography". Go to the bottom of the editor again and press "ADD TEXT". Now, select each text of the template and modify it in the "CUSTOM TEXT" field in the left-hand pane. You can also customize the color and other properties.

- It is also possible to add an image watermark. Go to the bottom of the editor and press "Add Logo". Go to the left-hand pane and click on "ADD LOGO". Browse to your image, select it and click on "Open". It will be added to the photo. Then, drag one control point to adjust the image size and use the "OPACITY" slider to make the image translucent.

- Where everything is ready, go to the bottom of the editor and press the "DOWNLOAD" button to start the watermarking conversion. When it is done, click on the watermarked image to download it.
Summary
It is annoying that someone takes the credit for the photographs he didn't produce. Letting people know the source of your photos is very important. One ideal method to protect your photos against copyright infringement is adding watermarks to them. Some photo editing beginners may have no clue about how to do it. This is why I want to write this article, which introduces 5 ways to watermark your photo. By the way, I don't suggest using a tiled watermark because it spans the full photo and affects the quality of the photo. If you know some other nice photo watermarking tools, share them with me by leaving your comment below.
Recommended Reading
Fast convert video formats with a video editor for newbies
3 online audio converters to help you get the desired format
3 reliable online tools to reduce the size of images