Posting a photo on your social media page is a nice way to boost engagement and social shares. Before publishing your photo, you may want to touch up it to make it more attractive. Photo framing is a nice touch to dress up your photo. If you are searching for the software tools that can help you frame your photo, please continue reading this article. In this article, I list 4 photo framing apps with which you can easily add frames to your photo.
#1. Fotor
Fotor is a cloud-based all in one photo processing app. It offers a comprehensive suite of utilities to retouch your photo. This app is a great alternative to many desktop photo design software programs. Its intuitive design ensures that any user can use advanced photo editing techniques to create excellent and stunning photos regardless of whether he is experienced or not in photo editing. Using Fotor requires an account but you can test its features before signing up. Speaking of photo framing, Fotor offers a variety of beautiful frames. There are 20 kinds of frames that are used for different occasions. They are "Floral", "Christmas", "Old School", "Simple", "Retro Cutie", "Borders", "Olden", "Organic", "Deco", "Lace Frame", "Stamp Frame", "Shadow", "Gallery Frame", "Polaroid", "Film Edge", "Classy", and "Cute". Some of them are available for free accounts while some are only accessible to pro accounts. Basically, each kind includes different frame effects. No matter what the type of your account is, you can preview all frame effects.
- Go to the homepage. Navigate to "Features" and select "Photo Frames". Press the "Add a Photo Frame Now" button.
- Click on "Open"->"Computer" to upload your photo.
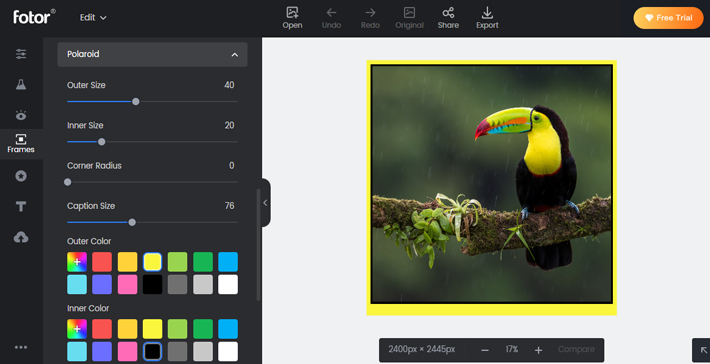
- In the left-hand "Frames" tab, choose one kind of frame. Then, select one frame effect in the drop-down menu. You will see the frames added to your photo in the preview panel. If you choose "Polaroid", you are given several options to edit the frames. You can adjust the widths of the outer frames and inner frames and customize the colors of the frames. You can also adjust the corner radius. You can even set the caption size so that you have enough space to add the caption.
- Press the "Apply" button to apply changes to the photo. Click on "Export". Specify the image quality and the image format. Click on "Download" to download the framed photo.
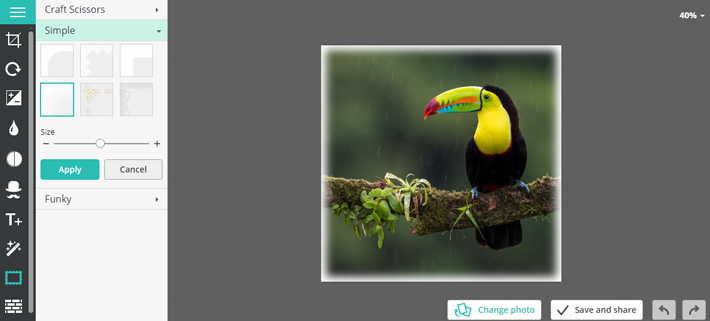
#2. Editor.Photo.to
Editor.Photo.to is an online photo editor with a straightforward interface. It makes photo framing extremely easy and provides 30 customizable frame effects. Besides, it lets you rotate and crop photos, add funny stickers and text captions to your photos, modify brightness, contrast, saturation, sharpness, shadows and highlights, and apply cool filters to your photo. Editor.Photo.to is completely free to use and there is no need to create an account for using it.
- Press "Get Started" on the homepage. Click on "from computer" to upload your photo.
- Go to the left-hand pane and select "Frames". There are three kinds of frames, "Craft Scissors", "Simple", and "Funky". Choose one kind you like. Then, select one desired frame effect. Drag the "Size" slider to adjust the size of the frames added to your photo.
- Click on "Apply". Press "Save and share". Designate the size, quality and format of the output photo. Choose to download the framed photo or share it to Facebook, Twitter, and Pinterest.
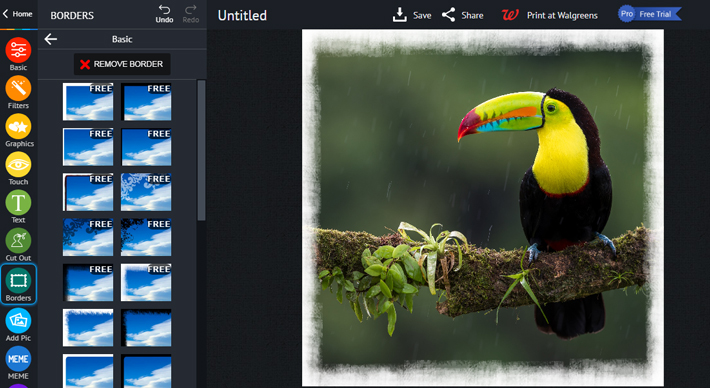
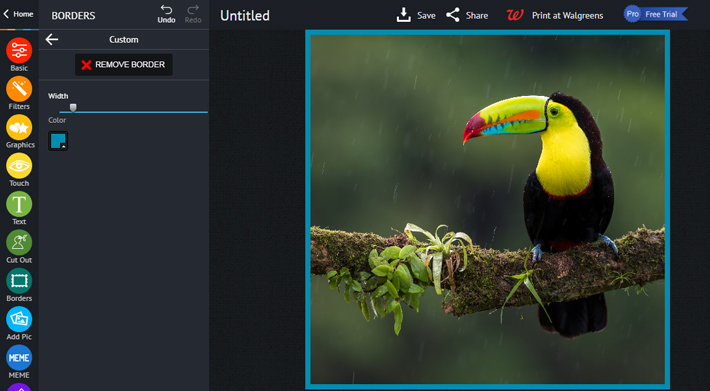
#3. piZap

piZap is another nice web-based photo editor. It provides 13 categories of frames for different situations. Many of them are free to use. Besides offering preset frames, it also allows you to make custom frames. You have to register an account even though you just want to test its features.
- Log in. Press the "Edit Photo" button. Click on "Computer" to upload your photo.
- Go to the left toolbar and select "Borders".
- Choose a frame effect under a frame category you want and it will be applied to your photo. If you want to make a custom frame effect, click on "Custom". Then, you can move the slider to set the width of the frames and pick a color as the color of the frames on the "Color Picker" panel.
- Press the "Save" button. Enter the name of the output image. Choose the quality of the output image. As a free-plan subscriber, you can only choose the "Standard" option. To choose "High Quality' and "Customize", you have to subscribe to the pro plan. Press "Save to computer" to save your framed photo to your hard drive.
#4. Microsoft Paint
Perhaps many people do not know that Microsoft Paint can be used to add simple color frames to your photo. Let's see how to add simple color frames to your photo with Microsoft Paint.
- Launch Microsoft Paint and throw your photo into the program.
- Go to the "Shapes" tab and choose "Rectangle". Click on the "Outline" tab at the right side of the "Shapes" tab and choose "Solid Color". Click on the "Size" tab and choose a size for the sides of the rectangle. Ensure the "Color 1" option is selected, which represents the color of the rectangle sides. Pick a color on the "Colors" tab and the fill within the "Color 1" option will change to the picked color.
- Place your mouse cursor at the top left of the photo. Draw a rectangle around all edges of the photo and you will have the color frames.

Summary
You may want to frame your photo to make it more eye-catching. I am sure that the four apps mentioned previously can help you obtain the photo frame effect that meets your requirements. If you know some other good apps, please let me know by leaving your comment below.
Recommended Reading
8 tools to get JPGs or PNGs from HEIC images