People in the world post and share images every day. In many cases, the image you want to publish online contains sensitive information. You have a website issue and want to propose a question on a forum to seek help. You need to insert a screenshot in the post but you don't want others to know your site domain captured in the screenshot. You have a photo of your new car and want to share it through social media to sport your car. But the photo displays the plate number you want to hide. You want to share the photograph of your house but it shows the door number you don't want others to see. You are a key opinion leader and are intended to post the picture of the parcel to inform your followers that you have received Dell G15. But your address and phone number are visible in the picture. It is very necessary to conceal your personal information to prevent privacy breaches. This is when you should blur a particular part of your image. In this article, I will teach you how to do this by using some software tools.
Use Photoshop to blur a particular part of an image
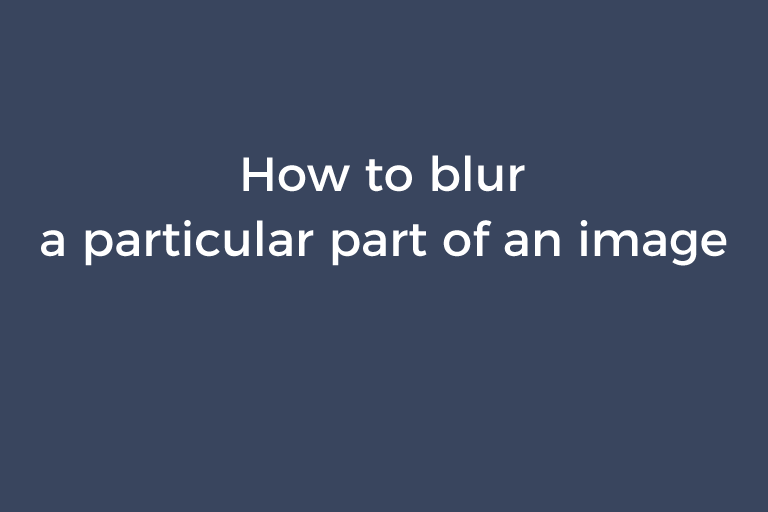
- Throw the image into Photoshop. Go to the left-hand toolbar and select the "Marquee" tool. The default marquee shape is a rectangle. If you want to choose another shape, right-click on the "Marquee" tool and choose the shape you like.
- Drag the marquee around the part you want to blur to select it.
- Click on "Filter" and go to "Blur". You will see different options of blurring effects. Some options like "Gaussian Blur" allow you to customize the strength of the blurring effect. Choosing "Gaussian Blur" will open the "Gaussian Blur" dialog box. Moving the "Radius" slider to adjust the effect until the selected becomes invisible.
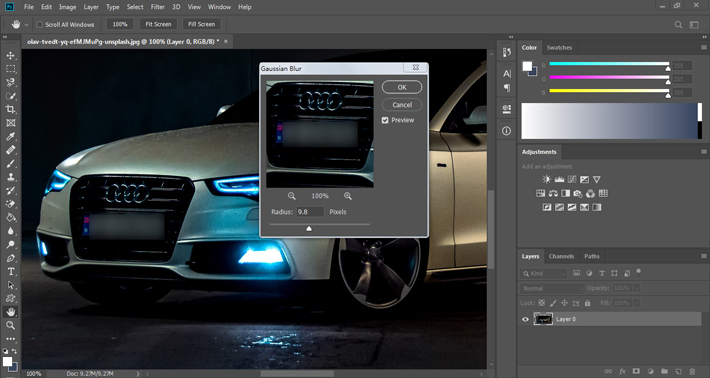
- There is another way to blur the sensitive part. Click on "Filter". Then go to "Pixelate"->"Mosaic". The "Mosaic" dialog box appears. Pull the "Cell Size" slider to adjust the mosaic effect until it fits your needs.
- Don't forget to save the changed image to a new file.
Use Peko Step to blur a particular part of an image
Peko Step is a nice free online image editor that allows you to edit images in a breeze. You can use it to blur a part of an image by adding a pixelating effect to it.
- Go to the left pane and select "Pixelate".
- Drag and drop your image onto the working area. You can click on the "Zoom" option and select the zooming percentage to make the imported image fit the screen.
- Go to the "Processing area" section. If you choose "Rectangle", the pixelating effect will be a rectangle. If you choose "Ellipse", the pixelating effect will be an ellipse. "Inside selection area" is selected by default. This means the pixelating effect will affect the part selected by the marquee. So you don't have to tweak the option of selecting the area.
- Drag the marquee around the part.
- Press the "Apply" button to apply the pixelating effect to the part. You will see the part is blurred in the preview area. If the effect is not satisfactory, go to the "Pixel Size" section and pull the slider to adjust the effect. Then, press the "Apply" again to check the new result.
- Right-click on the changed image and choose "Save image as". The changed image will be downloaded to your computer.
![]()
Use PineTools to blur a particular part of an image
PineTools is a web-based app that offers almost all tools you need to manipulate your image. It allows you to blur one part of an image by using its photo censoring tool.
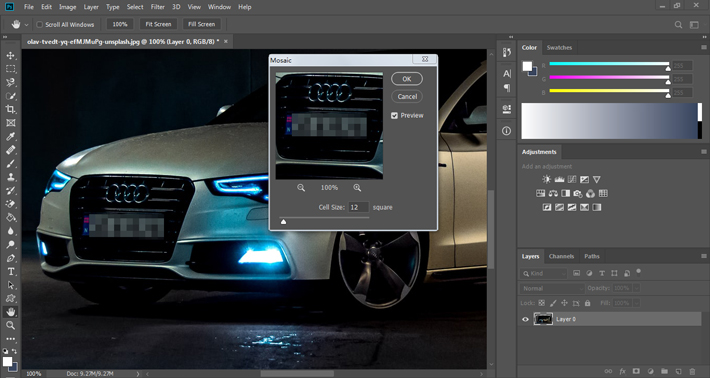
- Go to the homepage. Go to the left-hand pane and select "Images".
- Scroll down and you will see the "CENSOR PHOTO (BLUR, PIXELATE)" option. Click on it and you will be taken to a new webpage.
- Click on "Choose file" to upload your image. After your image is imported to the program, you may need to zoom in and pan the image so that you can easily select the part to be blurred. Click on the "Zoom in" button. Then click on the image to zoom it in. Click on the "Pan" button. Then, click on the image, hold down the mouse button, and move the image. As you can see, a marquee appears over the image. Click inside and marquee, hold down the mouse button, and move it to the part you want to blur. Then, adjust its width and height to pinpoint the part to be blurred.
- Go to the right "OPTIONS" pane. Choose "Pixelate" or "Blur" in the "Method" section. Choose "Rectangle" or "Ellipse" in the "Shape" section to specify the shape of the pixelating effect or blurring effect.
- Press the "CENSOR!" button. The changed image will show up in the preview area. If you are not satisfied with the result, adjust the value of "Block size" if "Pixelate" is chosen or the value of "Radius" if "Blur" is chosen. Press "CENSOR" again to see the new result.
![]()
- By the way, the censoring photo tool also lets you hide the sensitive information by covering the part with a solid color. Choose "Solid color" in the "Method" section and pick a color in the "Color" pane. Press "CENSOR!" and you will see the part is covered by the specified color.
- Click on PNG, JPG, or WEBP to specify the format of the changed image and save it to your hard drive.
Use Vertexshare Photo Stitcher to blur a particular part of an image
You can guess what Vertexshare Photo Stitcher is made for by its name. This lightweight app offers a series of editing tools to touch up your image. One of them is the mosaic tool, which lets you add a mosaic effect to a part of your image to blur the part.
- Drag and drop your image into the program. You can pull the zooming slider at the bottom left corner of the window to zoom in or zoom out the image. To pan the image, click on the image, hold down the mouse button, and move it.
- Go to the left-hand panel. Navigate to the "MOSAIC" section. 4 types of mosaics are available here. Select the one you like.
- Hover your mouse cursor over the part you want to blur. Click on it, hold down the mouse button, and drag to make the part blurred. You can click on the "Undo" button in the "MOSAIC" section to undo the last action. To remove the mosaic effect, click on the "Clear" button beside the "Undo" button.
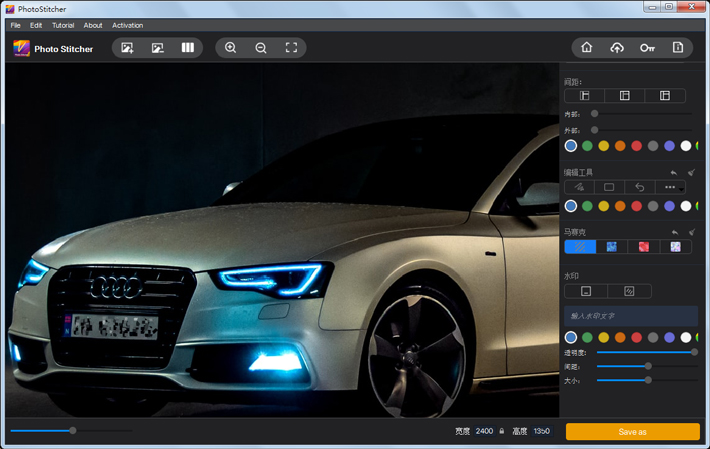
- Press the "Save as" button to export the changed photo.
Conclusion
Hiding your privacy in the image is very important. After reading the previous parts of this article, you must have mastered how to blur the part containing sensitive information. If you know other software tools you can lean in favor of, please let me know in the comment section below.